I am a professional photographer by trade and an amateur photographer by vocation.”
― Elliot Erwitt, Dog Dogs
This is the eighth publication of a series in which I’m addressing the topic of black-and-white. The series include posts and videos that can be easily located by using the tag “learning-black-and-white” either in the search box above, or by directly clicking on the tag name at the bottom of this post. Also, here is a link to the entire series so far.
So, continuing with the topics we’re covering in the series, today we’ll talk about toning and split-toning. Toning is a method to modify the overall tone of black-and-white photographs. In film photography, toning is a chemical process that besides altering the image tone, it helps to enhance the archival life of the print. In the other hand, split-toning is an effect that also has its origins in the film days, so it’s also a chemical process that consists on using one color to tint highlights and a different color for shadows, usually these colors are complementary colors, or close to complementary such as yellow and blue or green and magenta.
For years black-and-white photographers have debated if a toned, or split-toned image should still be considered a black-and-white image, or if the fact of using color to tint monochrome tones is enough to consider it a color image. So, putting that controversy aside, toning and split toning are options that non-purist black-and-white photographers have in order to present their work, that used in the proper way can help to ultimately convey moods and feelings that support your vision.
Now, in digital photography the effects of toning or split-toning are usually emulated by software in post-processing. So, as discussed in my previous post regarding post-processing techniques for black-and-white (see actual post here), split toning can be one of those fine-tuning tasks that should be performed as part of Phase 3 in the suggested workflow. So, if you didn’t read my previous post, I would suggest you do so, but what is important to understand for now is that toning should be one the last post-processing actions (or probably the last one) you perform on your image.

There are multiple ways you can tone a digital image using either Camera Raw/ Lightroom, Photoshop, or the plugin software you use to convert images to black-and-white. So, let’s take a look to some examples.
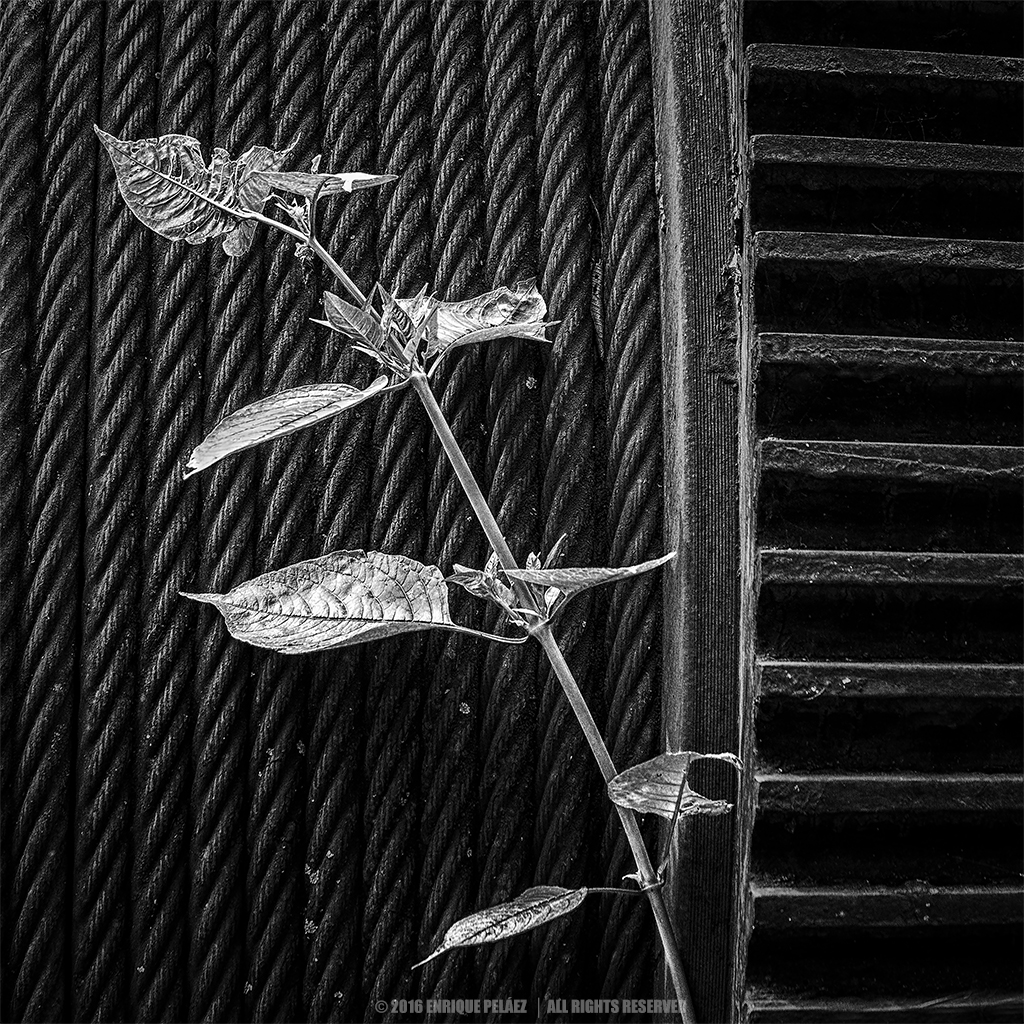
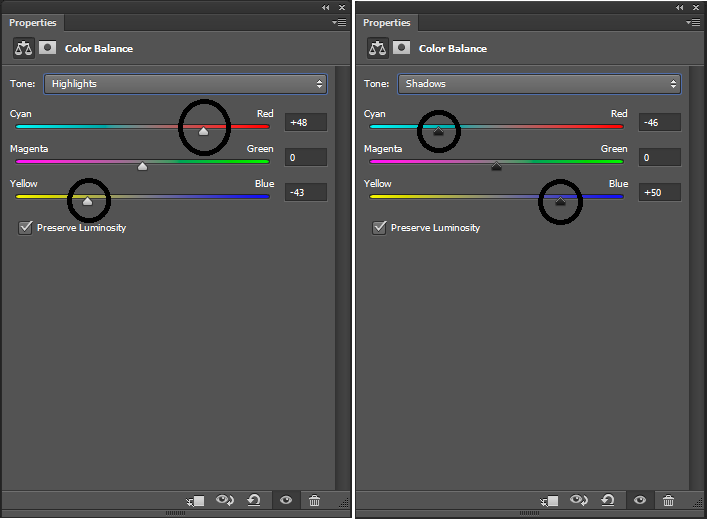
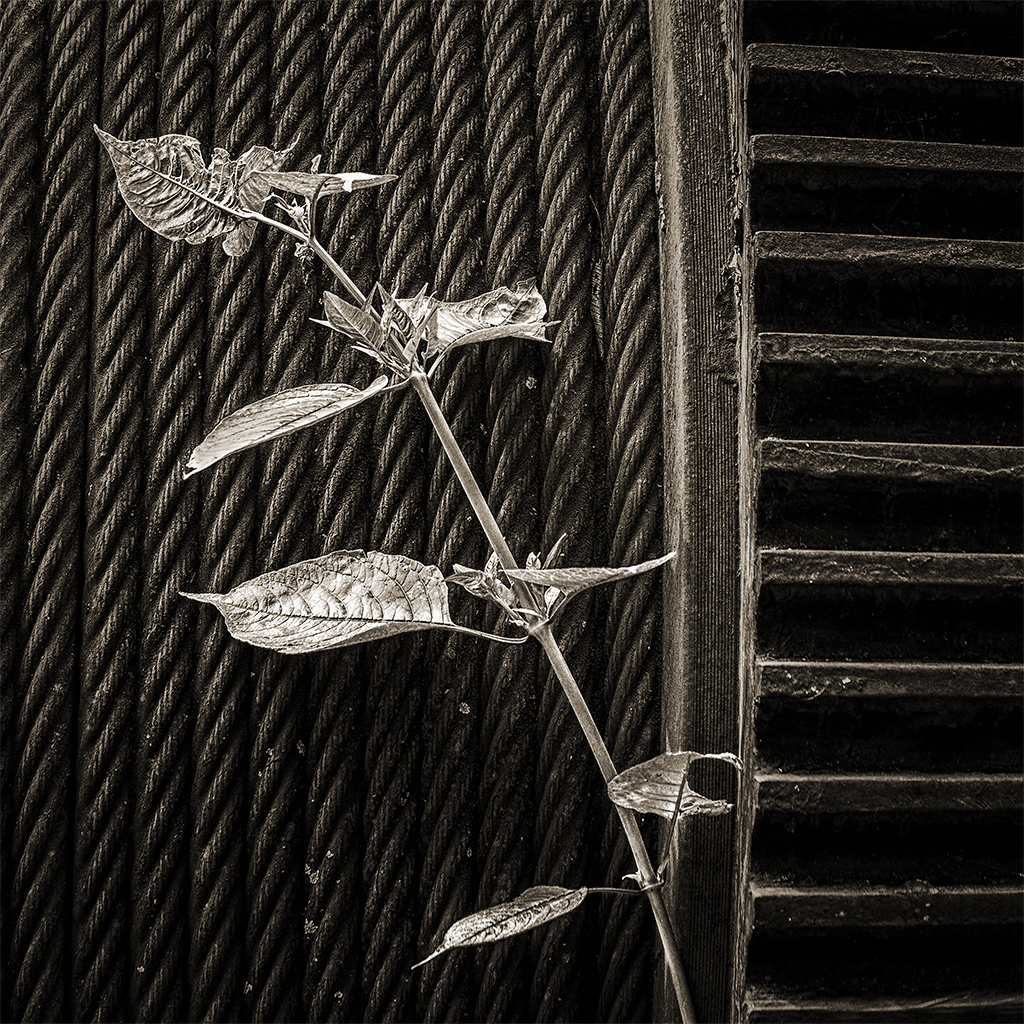
Figure 1 shows how a Color Balance Adjustment Layer in Photoshop was used in order to add a yellow-red tint to the highlights, and a blue-cyan tint to the shadows to obtain the Vintage look of the image shows in figure 2.

Adding a sepia tone to a black-and-white image in Photoshop can be as simple as using a Hue/ Saturation Adjustment Layer and apply the Sepia preset as illustrated in figure 3. Figure 4 shows the actual image on Sepia tone.
Now, before we finish this short post, I’d like to mention that in very rare occasions I use either toning or split toning to digitally present black-and-white images (either in social networks, in my blog, or in my website), the reason is not because I’m a black-and-white purist, but it’s more because of a practical reason. I usually print my images on silver gelatin, that is kind of the gallery standard for black-and-white fine art photography, so in order to print a digital image using this silver gelatin process you need first to find a laboratory that has the equipment to do so (it needs a very specialized, expensive equipment), then the image is printed in true black-and-white using a gelatin fiber printing method, and finally through a chemical process the desired toning is added — the most available toning options are sepia and selenium.
So, when I believe that one of my images can be benefited of this process, I simply add the toning process to the print order with the laboratory , but that is something that we will discuss with more detail in the next post of this series.
In the next post of this series I’ll talk about printing black-and-white images. Let’s keep in touch.
I do appreciate your comments and suggestions. If you are interested in more information regarding the making of my images, as well as general information about black-and-white photography, please subscribe to my blog to receive automatic notifications every time I publish a new post.
Website – http://www.enrique-pelaez.com/
Facebook Page – https://www.facebook.com/EnriquePelaezPhotography
Google Plus – https://plus.google.com/u/0/+EnriquePelaez
